 RSS Feed
 Twitter

 03:40
03:40
 Unknown
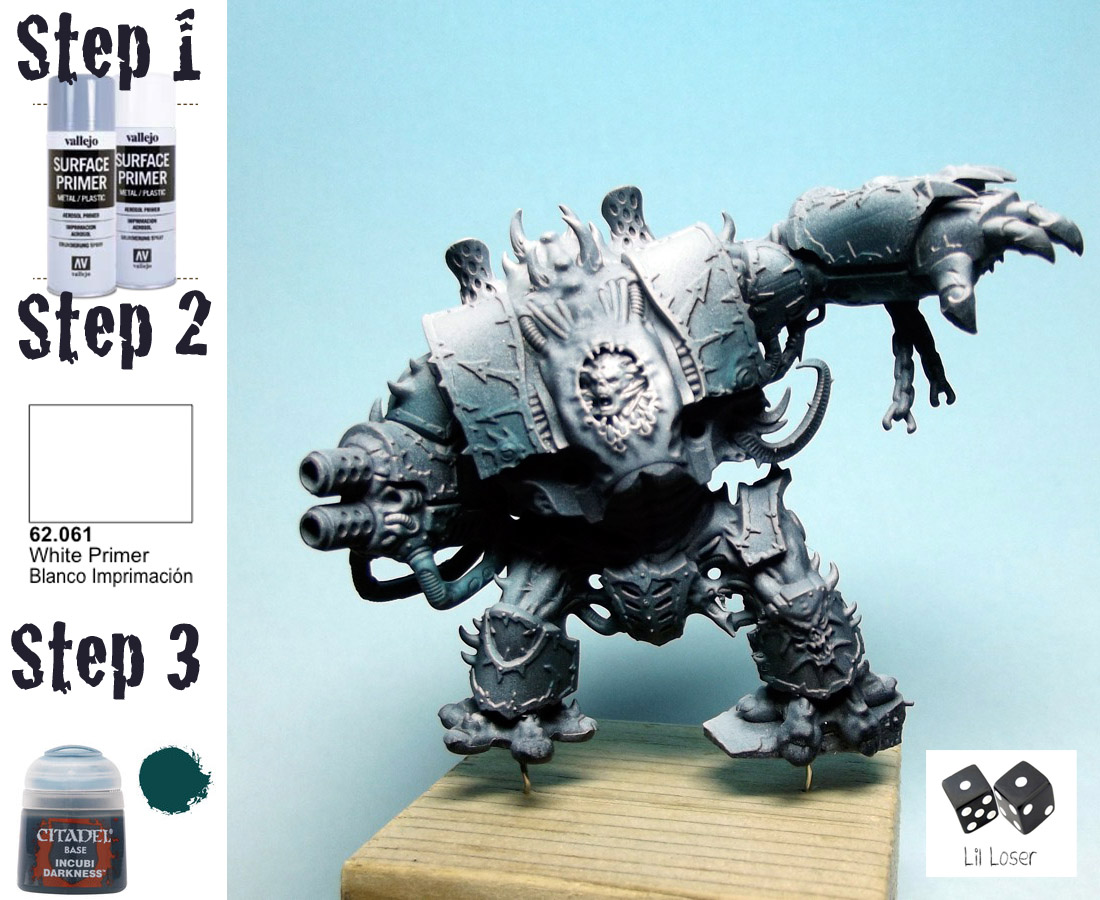
Step 1
Prime miniature black with aerosol can. I use Halfords Car
Primer Black matt because I know that I will be ‘dusting’ the miniature with
Vallejo Primer which offers the surface I need for smooth progressive blending.
Vallejo surface primers (both aerosol and Air) are good and I have found army
painter’s line of aerosol primers to be excellent.
Step 2
‘Dust’ miniature white. Dusting is a technique where white primer is sprayed at the top most part of the miniature at a 45 degree angle. This creates the false impression of light hitting a surface and helps me decide where to put highlights and shadows. We can also start directing focus by highlighting certain areas like the head a little more.
Dusting also helps give you a head start on troublesome colours like yellow and red when working from a black base coat.
I use Vallejo White Primer run through an airbrush to give me greater control of where I want the areas of interest to lie.
Step3:
Airbrush Citadel’s Incubi Darkness into darker parts of amrour. This stage is a pre-shade for the red. Incubi darkness is primarily blue with a hint of green with will help add interest to the shadow. This stage will also help us blend the red from light to darkness.
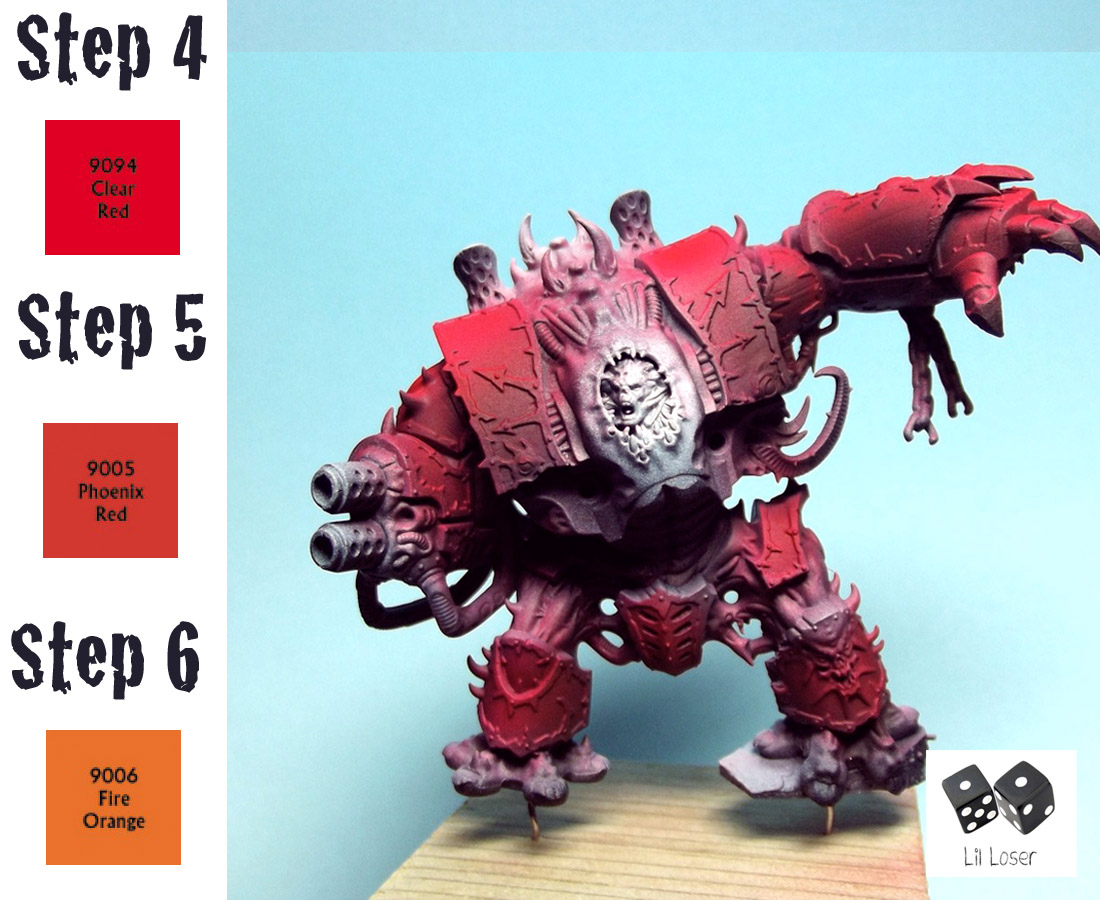
Step 4:
Airbrush Reaper Master Series (RMS) diluted with gunk and
Vallejo Airbrush solution (40;20;40).
The paint should be thin enough to allow the Incubi Darkness
from the previous stage to be seen through the coat of red. Give the armour 2-3
thin coats of red to ensure a consistent finish.
Step 5:
Mix RMS Phoenix Red into whatever is left from stage 4
(remember to keep the same consistency
of gunk and airbrush solution to paint)
and highlight armour plates from a 45 degree angle.
Although this stage may not seem to be doing much, it will
pay off in the end.
Step 6:
Extreme highlight RMS Fire Orange onto highest parts of
model. Airbrushing the amrour is now
complete.


Step 7:
Cover armour plates with low tac masking tape and blu-tac
(for those hard to reach places).
Airbrush shadowed areas with RMS Bronzed Highlight. Don’t be
afraid of overlapping with the highlighted areas of the flesh.
Step 8:
Airbrush highlighted areas of flesh with RMS Fair
Shadow. Make sure all areas of flesh
have been painted (don’t worry too much about overlap between step 7 & 8).
Part two covering metals, oil skin and glowy effects coming soon!
 Posted in


0 comments :
Post a Comment